Chains & Sprockets
Kenya Rider’s Complete Guide
No component transfers power from your engine to your rear wheel more directly than the chain and sprocket set. Yet it’s one of the most neglected parts on Kenyan roads. Ask any mechanic on River Road or along Thika Highway and they’ll tell you the same story: worn-out chains that stretch to dangerous lengths, front sprockets eaten down to shark fins, and rear sprockets so hooked they skip under hard acceleration.
Whether you’re a boda boda rider clocking 150+ km daily, a weekend trail rider on the Ngong Hills, or a commuter navigating Nairobi’s stop-start traffic, your drivetrain takes punishment every kilometer. This guide gives you the knowledge to inspect, maintain, and replace your chain and sprocket set before a roadside breakdown happens at the worst possible moment.
Anatomy of Your Drivetrain
Know the parts before you maintain them
Your motorbike’s final drive consists of three key components that work together as one system. Neglecting any single part affects all three — they wear as a set and should ideally be replaced as a set.
The Three-Part Power Transfer System
Bolted to the gearbox output shaft. Typically smaller — 14 to 17 teeth. Rotates faster and wears out first.
Bolted to the rear wheel hub. Larger — typically 38 to 48 teeth. Determines final drive ratio and affects speed vs. torque.
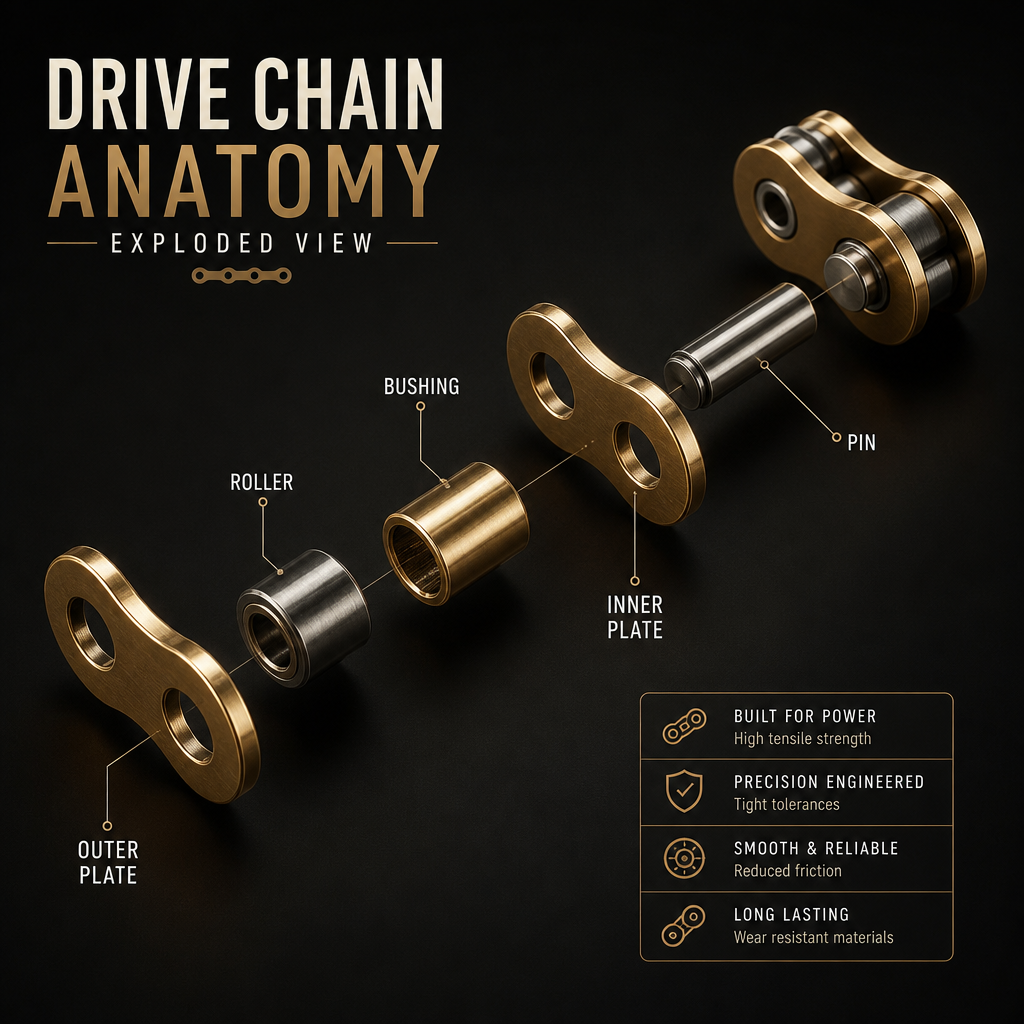
Endless loop of roller links connecting front and rear sprockets. Length measured in link count. Common sizes: 428, 520, 525, 530.
Removable link that allows chain replacement without splitting. Critical — always replace when fitting a new chain.
Inner rubber/metal rollers inside each link. They contact the sprocket teeth directly. As they wear, chain pitch increases (stretch).
Found on premium chains. Tiny seals that trap grease inside each roller pin. Dramatically extends chain life in dusty Kenyan conditions.
How to Detect Worn Parts
Identify wear before it becomes dangerous
Chains don’t snap without warning — they degrade gradually through a process called pitch elongation, where the distance between roller pins increases as internal components wear. By the time you feel the bike surging or skipping gears, the wear is already severe.
Chain Wear: Expected Lifespans in Kenya
Kenya’s mix of tarmac, murram, dust and mud means chains wear faster than manufacturers’ quoted figures — especially for boda boda operators.
Quick Wear Test
Pull the chain away from the rear sprocket at the 3 o’clock position. If you can pull it out more than half a tooth’s height, the chain is worn and needs replacing. You can also measure 20 links: they should span exactly as per your chain spec sheet. 3mm+ of excess means replace immediately.
Sprocket Wear Signs
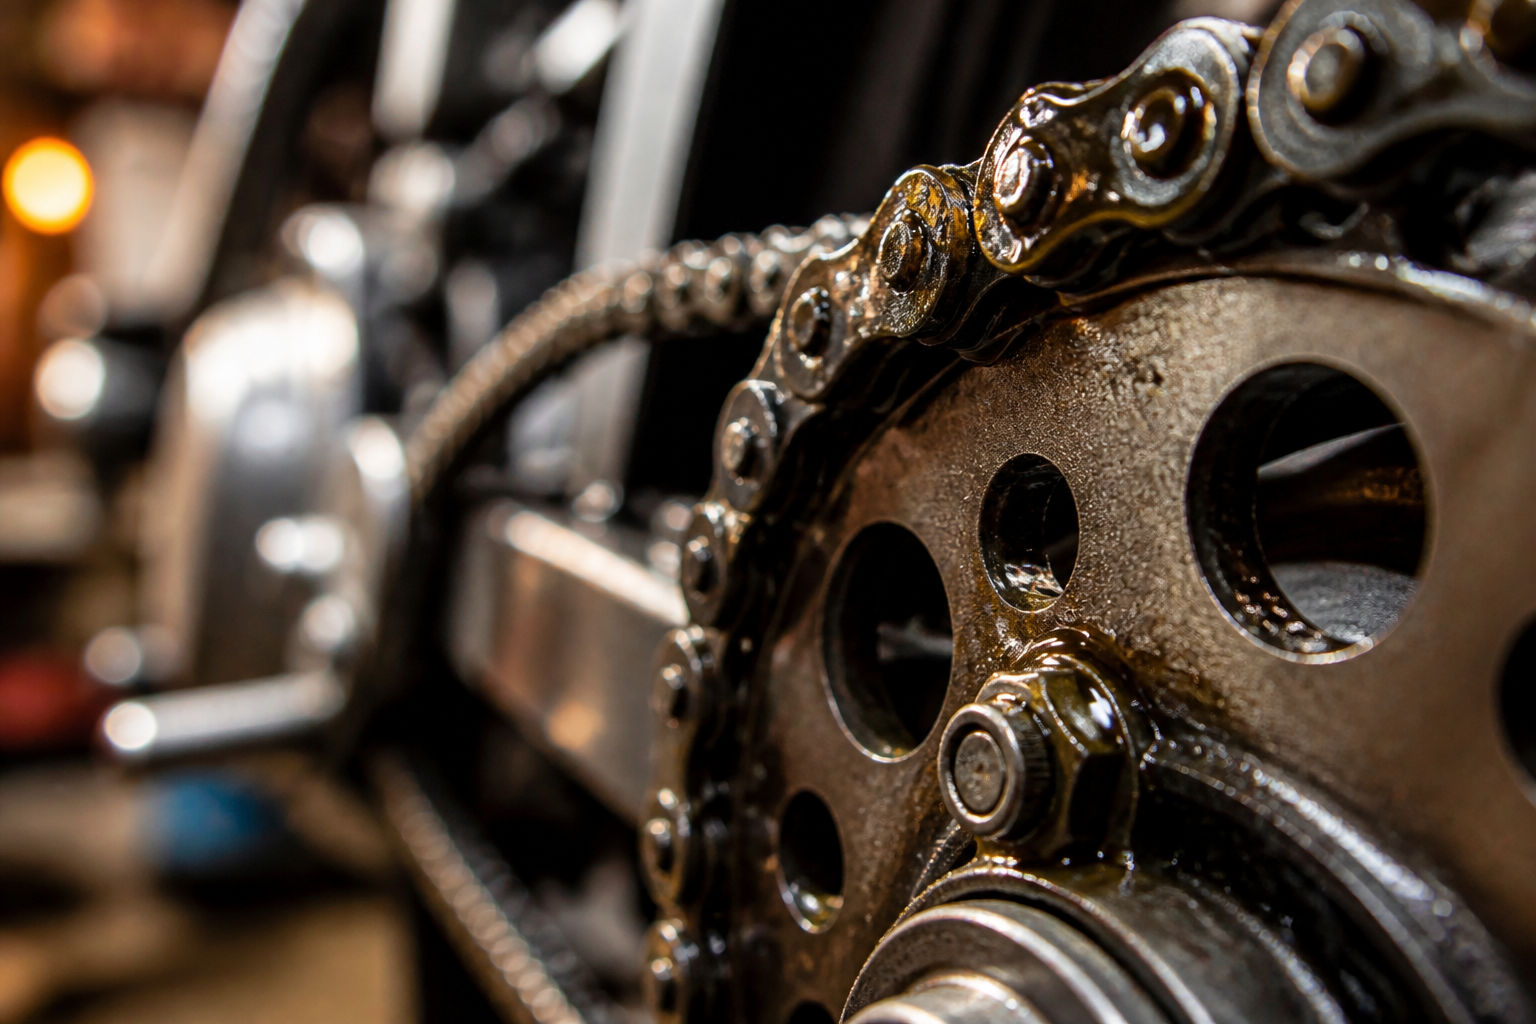
Sprocket wear is visual — look at the tooth profile. A healthy sprocket tooth is symmetrical and rounded at the tip. A worn tooth looks like a shark fin or wave — sloped heavily on the trailing edge from chain pressure. Common warning signs:
- Hooked or asymmetric tooth profile on front sprocket
- Chain jumping or skipping under load (acceleration or hills)
- Rear sprocket teeth visibly shorter on one side
- Chain riding high on sprocket teeth rather than seating in valleys
- Vibration or clunking during gear changes
- Visible rust or brown discoloration on teeth (Kenya coast humidity)
⚠ Never Replace Chain Alone on Worn Sprockets
A new chain fitted to worn sprockets will wear out in half the normal time — the mismatched pitch loads every link unevenly. Always replace the front sprocket, rear sprocket, and chain together as a matched set. This is the single most common and costly mistake Kenyan riders make.
Chain Tension: Getting It Right
Too tight or too loose — both destroy drivetrains
Chain tension is one of those adjustments many riders ignore until something breaks. Running a chain too tight overloads the gearbox output shaft bearing and causes early chain failure. Running it too loose risks the chain jumping off the sprocket at speed — a catastrophic event, especially at highway speeds on the Mombasa Road or Eastern Bypass.
Chain Tension: Three States
Too Loose
More than 30–35mm of vertical play at midpoint. Chain can jump sprocket. Slaps swingarm. Wastes power.
Correct
20–25mm vertical play at midpoint with rider weight on bike. Smooth power transfer. No slap or binding.
Too Tight
Less than 10mm play. Overloads bearings. Chain and sprockets wear in days. Engine strains through resistance.
How to Adjust Tension
-
Position the bike correctly
Put the bike on the centre stand or a paddock stand so the rear wheel is off the ground. The chain is at its tightest at the point where both sprockets and chain form a straight line — check tension at that point. -
Loosen the axle nut
On most 125–150cc commuters (Honda CG125, Boxer, TVS Star, Bajaj), loosen the rear axle nut just enough to allow wheel movement. Don’t remove it — keep control. -
Turn adjusters equally on both sides
Use the chain adjuster bolts (one on each side of the swingarm). Turn each by the same number of flats to keep wheel alignment true. Misaligned wheels cause rapid uneven tyre wear. -
Check alignment marks
Swingarm alignment marks (notches or lines) must match on both sides. If they don’t, the wheel is crabbing and your tyre will wear to one side. -
Re-torque axle nut
Tighten to spec — typically 65–80 Nm for most 125–150cc bikes. Never just “tighten until firm.” An under-torqued axle nut can walk loose.
Chain Lubrication in Kenya
The right lube for dust, rain and heat
Kenya presents a unique challenge for chain lubrication. Nairobi’s murram dust gets into everything. The coast’s salt-laden humidity accelerates corrosion. Western Kenya’s rainy season washes lubricant off chains in minutes. And Rift Valley’s dry heat bakes old grease into a grinding paste.
The right lubricant for your riding environment makes the difference between a chain lasting 8,000 km and one lasting 25,000 km on the same bike.
Dry Lube (Wax)
Penetrates then dries to a waxy film. Doesn’t attract dust. Ideal for Central highlands, Rift Valley dry season. Re-apply every 400–500 km.
Wet Lube (Oil)
Stays on in wet conditions. Use during Kenya’s rainy seasons (March–May, Oct–Dec). Re-apply every 200–300 km in rain.
Chain Spray
Most practical for Nairobi commuters. Fast application, reasonable longevity. Apply to inner surface while spinning wheel slowly. 500–600 km intervals.
Gear Oil / Used Engine Oil
Common roadside ‘hack’ in Kenya. Too thin — flings off at speed and attracts grit. Used oil contains metal particles that act as abrasive. Avoid completely.
Lubrication Procedure (Step-by-Step)
-
Clean first — always
Spray chain with kerosene or a dedicated chain cleaner. Scrub with an old brush or chain cleaning tool. Spin the wheel to access all links. Never use a pressure washer — it forces water into O-ring seals. -
Dry completely
Wipe with a rag and allow 5–10 minutes for solvent to evaporate. Applying lube over wet solvent dilutes it and reduces effectiveness. -
Apply to inner surface
Hold the nozzle at the inner side of the chain (facing the sprocket, not outward). Lube must reach the inner rollers — the outer surface just flings off at speed. Rotate wheel slowly as you apply. -
Wipe excess
After 5 minutes for penetration, wipe the outer plates and rollers with a rag to remove excess lube. Excess lube attracts dirt and creates the grinding paste that destroys chains. -
Apply before a ride, not after
Heat from a just-ridden chain opens pores and helps lube penetrate. Apply while chain is warm for best results. Allow 5–10 minutes before setting off.
Sprocket Specs by Bike Model
Kenya’s most common motorbikes — OEM and aftermarket specs
Knowing your bike’s original sprocket combination is essential before replacement. Changing sprocket tooth counts alters your final drive ratio — more rear teeth = lower gearing (more torque, less top speed), fewer rear teeth = higher gearing (more top speed, less torque at low rpm).
| Bike Model | Chain Size | Front | Rear | Links | Use Case |
|---|---|---|---|---|---|
| Honda CG125 / CB125 | 428 | 14T | 38T | 110 | Boda Boda |
| Bajaj Boxer / CT100 | 428 | 14T | 40T | 114 | Boda Boda |
| TVS Star City / Apache 150 | 428 | 15T | 46T | 110 | Commuter |
| Yamaha YBR125 / FZ150 | 428 | 15T | 43T | 110 | Commuter |
| Honda CRF150 / XR150 | 428 | 14T | 50T | 120 | Trail/Off-road |
| Suzuki GS150 / GN125 | 428 | 14T | 42T | 112 | Boda Boda |
Modifying Your Gearing
Adding 2 teeth to the rear sprocket (e.g. 38T → 40T on a CG125) noticeably improves pulling power for heavy loads — popular with boda bodas carrying two passengers uphill. It reduces top speed by roughly 5–8 km/h. Removing 1 tooth from the front has the same effect as adding 3–4 to the rear — more dramatic change in less material cost, but front sprockets wear faster at smaller sizes.
Replacement Costs in Kenya
What to expect in Nairobi, Mombasa and upcountry towns
Chain and sprocket pricing in Kenya varies enormously between genuine OEM parts, quality aftermarket, and counterfeit copies. The cheapest option on River Road or Kirinyaga Road may look identical to the genuine item — until it fails at 4,000 km. Here’s a realistic 2026 pricing guide.
Parts Cost (Nairobi Market — July 2026)
At Cycle Importers Kenya, we stock a curated range of genuine-quality chain and sprocket kits sourced directly from verified manufacturers — not grey-market imports. Our kits come pre-matched for Kenya’s most popular 125–150cc models and include a quality master link clip at no extra charge.
Maintenance Schedule
Kenya-specific intervals for maximum drivetrain life
km
Lubricate Chain
Clean + re-lube. Every 300 km if riding in rain or murram.
km
Check Tension
Measure slack with rider seated. Adjust if outside 20–25mm spec.
km
Measure Stretch
Measure 20-link span. Replace if elongation exceeds 3mm.
km
Inspect Sprockets
Check tooth profile. Replace set together if hooked or asymmetric.
Spot Fake Chains & Sprockets
Kenya’s counterfeit spare parts problem is real
Counterfeit drivetrain components are one of the most dangerous products circulating in Kenyan spare parts markets. A fake chain may look identical to a genuine part, carry the right brand markings, and even come in convincing packaging — but the steel grade, heat treatment and roller tolerances are far below spec. Fake chains have been documented failing at just 800 km.
How to Spot Genuine Parts
- Weight: Quality chains have a satisfying weight. Budget fakes feel noticeably lighter due to thinner side plates and hollow pins.
- Pin end finish: Genuine chains have cleanly peened or smooth pin ends. Fakes often show uneven, rough, or jagged pin ends.
- Roller fit: Squeeze individual rollers — they should feel firm and consistent. Loose, rattling rollers indicate poor manufacturing tolerance.
- O-ring integrity: On O-ring chains, O-rings should feel soft and supple (not hard or brittle from storage), and seated flush in their grooves.
- Packaging: Genuine brands (DID, RK, Regina, EK) use properly sealed, labeled packaging with model numbers. Loose chains or generic packets with handwritten labels = avoid.
- Sprocket tooth edge: Genuine sprockets have smooth, machined tooth edges. Fake sprockets show rough, unmachined flash on tooth edges from poor stamping.
⚠ The River Road Rule
If the price is more than 40% below market rate and the seller can’t name the brand’s country of manufacture or show a verifiable invoice, walk away. Chain failure at speed is not a risk worth taking to save KSh 500. Buy drivetrain components only from reputable dealers with verifiable supply chains.
Cycle Importers Kenya sources all spare parts directly from verified distributors and carries full product traceability. We stock DID, RK and Regina chains alongside quality OEM-equivalent sprocket sets for all major brands operating in Kenya.
DIY vs. Taking It to a Mechanic
What you can do yourself, what to leave to the pros
| Task | DIY Difficulty | Tools Needed | Recommendation |
|---|---|---|---|
| Lubrication | Very Easy | Chain lube, rag | Always DIY |
| Tension Adjustment | Easy | Spanners, ruler | DIY |
| Chain Measurement/Inspection | Easy | Ruler, chain wear tool | DIY |
| Sprocket Visual Inspection | Easy | Eyes only | DIY |
| Chain Replacement (clip link) | Moderate | Pliers, chain tool | DIY with guide |
| Front Sprocket Replacement | Moderate | Impact wrench, circlip pliers | DIY or mechanic |
| Rear Sprocket + Full Kit | Involved | Full toolkit, torque wrench | Mechanic recommended |
| Wheel Alignment Check | Moderate | String/laser alignment tool | Mechanic for accuracy |
For complete chain and sprocket kit replacement in Nairobi, expect to pay KSh 500–1,200 for labour at a reputable workshop. The total job — including parts from Cycle Importers — should take 45–90 minutes with an experienced mechanic. Always ask them to torque the axle nut to spec and verify wheel alignment before you ride away.
Need a Chain & Sprocket Kit?
Tell us your bike model and we’ll match you with the right quality kit — delivered fast or ready for pickup in Nairobi.